
The story starts about 20 years ago when my mama purchased two oval, oak-framed mirrors. They hung on the wall all growing up, but for the past few years, the mirrors have been collecting dust in a dark closet. I asked my mom if I could adopt them, and this weekend, I gave them a new look. The frame below is just one of the two - I did the other frame a different color and will post that one later this week.
1. Meet the frames: (cost = free)


Just have to give a shoutout to my mentor/ tutor, Wendy from Sawdust. I had the end image in my mind of how I wanted these frames to turn out, but she helped talk me through the between steps. She does this kind of stuff all the time and is so incredible at it! Check her out!
1. Meet the frames: (cost = free)


2. Sand the heck out of the frames... no more finish left on these suckers.
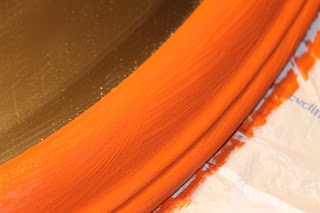
3. Paint the base color. I already had my color combination picked out, and purchased basic acrylic paints from the craft store. (On sale for $0.79.)


4. Let dry. Sand edges and hammer, whack and chink away. I raided my dad's tool box and found a hammer, but this handy little thing (in the picture) was exactly what I needed. It was sharp on the end so I was able to just shave chunks out of the wood. (Don't be afraid of messing with the wood...it's actually quite fun, and it gives the frame a lot of character.)


5. I got this crackle stuff from the craft store...it was just a couple of dollars. After the orange paint dried, I painted the crackle lacquer on top and let that dry for an hour.

6. Then, paint the final color on top and let it dry. Voila! I chose a fun aqua blue/ turquoise and brushed that on top... not a very thick layer. I wanted to let the orange show through. The crackle helped, but I rubbed some of the blue off as well. Then I took a burnt umber brown and rubbed some of that on to give it a stained look. I sanded some areas down to let more orange show through.


I love it - super excited with the way it turned out. I really like the look of hanging it horizontally, not vertically. Anyway... hope you enjoyed it. I've got another one coming soon!
Ash, that's beautiful! That would look cool in the same room with that mosaic table you have.
ReplyDeleteThey are amazing and beautiful. Good Job!!!
ReplyDeleteThose look great! Nicely done :)
ReplyDeleteVery cute! How did you paint it so the blue didn't cover all the orange and wear you put into it?
ReplyDeleteI looove it! Super rad.
ReplyDelete@Amy - after I painted the orange on there, I let it dry, then put a layer of crackle on there. Once it dries, I paint the blue on top (a very light layer) and then it cracks and the orange peeks through. I also did a lot of sanding to let the orange come through.
ReplyDeleteoh my goodness! i love that! you are so crafty!
ReplyDeleteIt did turn out awesome. I can't wait to see it in person. Yes, Wendy has amazing tips, huh!
ReplyDeleteIt looks great!
ReplyDelete